On this page
Using lens flare in your photos can enhance their visual appeal, just like adding a special ingredient can elevate the taste of a dish. Lens flare refers to the light that enters your camera lens, bounces off different lens elements, and creates a flare in your picture without forming any particular image. Photographers often use lens hoods and filters to decrease lens flare, but it is possible to utilize this phenomenon to add interest to our photos. Using simple tools and creative ideas, we can easily capture lens flare in our images by taking advantage of the sun or creating it artificially, resulting in improved visual appeal. Today, we will provide seven tips for using lens flare for creative photography.
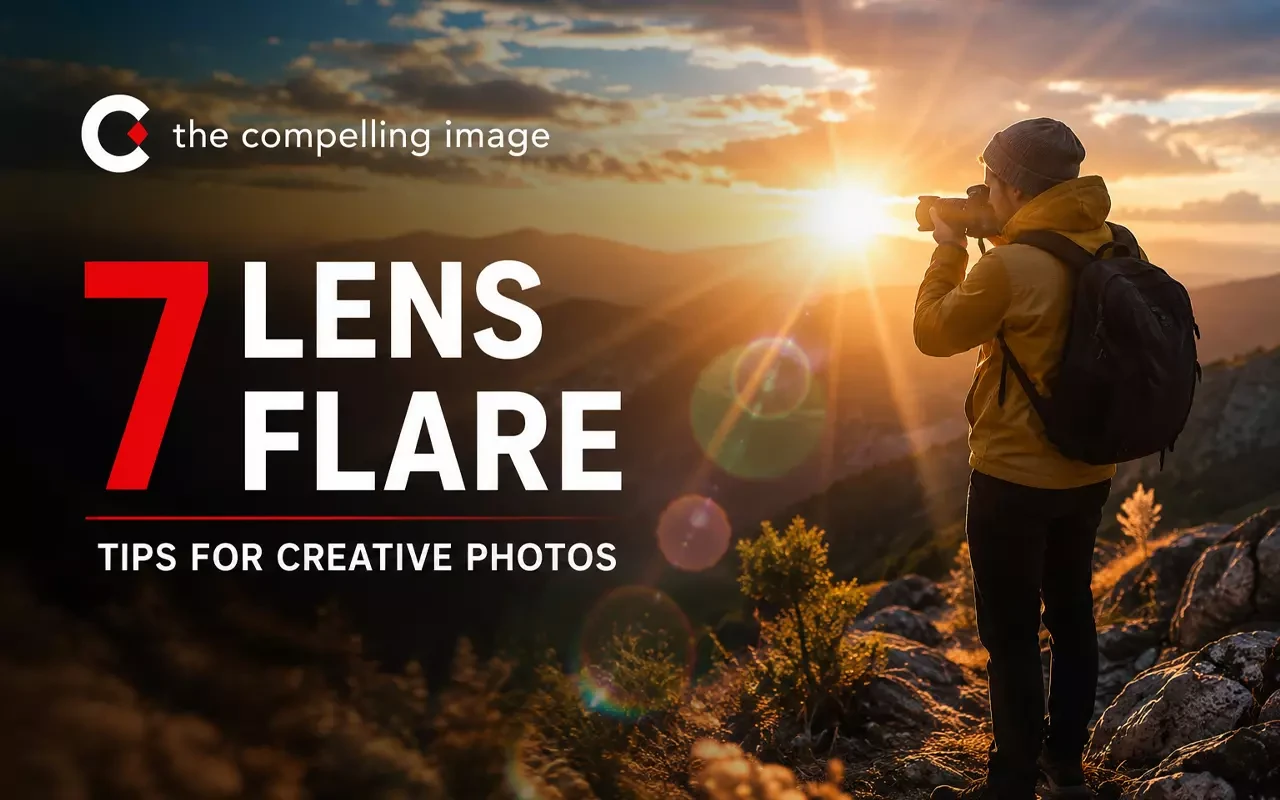
Lens Flare Tips for Creative Photos
-
Use the Sun for Natural Lens Flare
-
Watch Your Angles
-
Adjust Your Aperture
-
Create a Ring of Fire
-
Re-Create the Sun with Flash
-
Capture a Lens Flare at Night
-
Finalize the Lens Flare in Post
Explanation of all 7 Tips for Creative Photos
All of the above tips for creating creative photos and pictures using lens flare have been explained clearly here one by one.
1. Use the Sun for Natural Lens Flare
Use a natural light source to begin our list of tips for creating creative photos with lens flare. Using the sun is a straightforward option for adding lens flare to photographs. Using the sun, you can make this creative effect, but plan your shoot accordingly and ensure favorable weather conditions. I suggest using a specialized app such as Sun Surveyor to plan your shoot during golden hour. By doing so, you can increase your chances of capturing lens flare in optimal conditions. If the sun is not visible, try following tip #5 to simulate a lens flare.
Lens Flare Tips for Focusing
If the sun does appear, you will take a photo directly facing it. Position your subjects before the sun with the light shining behind them for the best results. This will create a backlight effect. You should try different techniques to sharpen focus on your subjects as the bright light source is directly aimed at your lens. If your camera's autofocus is not working correctly, you can use manual focus through your camera's live view feature to achieve better focus. If this method is unsuccessful, you may want to try focusing on another object in the same plane, then lock the focus and adjust the shot accordingly. Try one of these methods depending on your camera and lens. Keep in mind that the results may be different.
2. Watch your Angles
Adding a lens flare effect can be tempting, but it's essential to be cautious not to make the photo too bright or overexposed. It's crucial to partially block the incoming light into the lens to maintain contrast and prevent the loss of details. Avoid placing the flare directly over your subject's face, which can distract from the overall image. Adjust your camera's angle until you achieve the desired dramatic effect without causing overexposure in other parts of your photo. Additionally, it's a good idea to take multiple shots to ensure you have some high-quality options.
3. Adjust your Aperture
To capture different types of lens flares, adjust your aperture settings. This can change the size and shape of the flare. A wide aperture can create a "blooming lens flare," which is excellent for cinematic portraits. However, a narrower aperture will produce a starburst effect, with rays emanating from the center of the light source. Remember that not all lens flares will look the same, so try experimenting with different aperture settings.
4. Create a Ring of Fire
The Ring of Fire is not only a Johnny Cash song. It's also a term for photos that use a specific tool to produce a unique lens flare. You can find the instrument commonly used at hardware stores: a tube with a diameter of 1 inch and a length ranging from 3/4 to 1 inch.
Ring of Fire Lens Flare Tip
Position a copper or metal tube between your camera lens and the light source to get this specific visual effect, then move your camera around until the desired flare is achieved. Using your camera's live view feature is recommended, especially when attempting this technique.
Lens Choice
To create a ring of fire shots, prime lenses with wide apertures in the 35mm to 50mm range are recommended. Different lenses have varying coatings that affect how well they capture lens flares. Newer lenses usually have more advanced layers to prevent flare, so try experimenting with an older lens. It's best to start with what you already have before buying new gear.
5. Re-Create the Sun with Flash
Lens flare in photos is not limited to certain times of day like a golden hour. It is a versatile effect that can be used anytime and anywhere with the help of off-camera flash power, preferably 200-watt seconds or more.
To recreate the sun with a flash, it's crucial to match the direction of the existing light (where the sun is or would be in the sky) and ensure that the background is adequately covered to achieve a convincing look. This may require tighter shots to remove elements that can't be illuminated with the off-camera flash. Moreover, position the flash at a distance from your subjects to backlight the features visible in the frame. Use a Flashpoint eVOLV 200 or Profoto b10 to ensure sufficient lighting. Additionally, consider placing a CTO (color temperature orange) gel over the flash to replicate the warmth of sunlight.
6. Capture a Lens Flare at Night
We previously discussed capturing lens flares during the day. Have you considered creating nighttime lens flare effects? They add a different look to photos; experimenting with them can be worthwhile. You can still utilize existing light sources in your scene or use off-camera flash to produce lens flares at night. Remember that the goal isn't to replicate sunlight but to use the flares to add a distinct twist to your nighttime portraits.
Location and Basic Exposure Settings
To get better night shots, choosing a location with street lights and buildings is best. This will help you make the most of the technique. Since you'll need to push your camera's low light capabilities to get decent exposure, these settings may help 1/100th of a second, f/1.4, and ISO 3200, just like in the image above.
Light Placement
For the image above, I positioned a Profoto B10 with a gel and grid behind the couple at a distance of about 10-20 ft. Since I had already adjusted the exposure settings to be bright, I didn't need to use much flash power. I set the flash to a lower ability to reduce recycle time between shots. Lastly, I placed a copper tube over the lens, determined my angle, and took the picture.
7. Finalize the Lens Flare in Post
After discussing how to capture lens flare using natural and artificial light sources, let's explore how to improve or generate this effect through post-production. We can easily enhance our lens flare by utilizing software such as Lightroom and Photoshop to achieve our desired result.
To improve clarity, we will be making some adjustments in post-production. Although we have different ideas of what looks right, I won't provide specific settings. Instead, if you make general adjustments as outlined below, you should be good:
-
Improve the details that might have been lost by increasing the contrast and clarity.
-
Increase the contrast by darkening the black color.
-
Consider adjusting the color temperature and hues to make the colors more vibrant. Also, make the colors warmer.
-
To enhance the natural vignette in light flare photos, let's add a radial burn (commonly set to -.50) around our subjects.
Creating a Lens Flare in Post
It's worth noting that if you didn't capture a lens flare in your photo with natural or artificial light, you could still add it later during post-processing. To do this in Lightroom, customize a brush using the settings I've provided for the Sun Flare brush, as shown in the screenshots below. You can tweak the size, warmth, and opacity settings.
Lens Flare Brush Settings
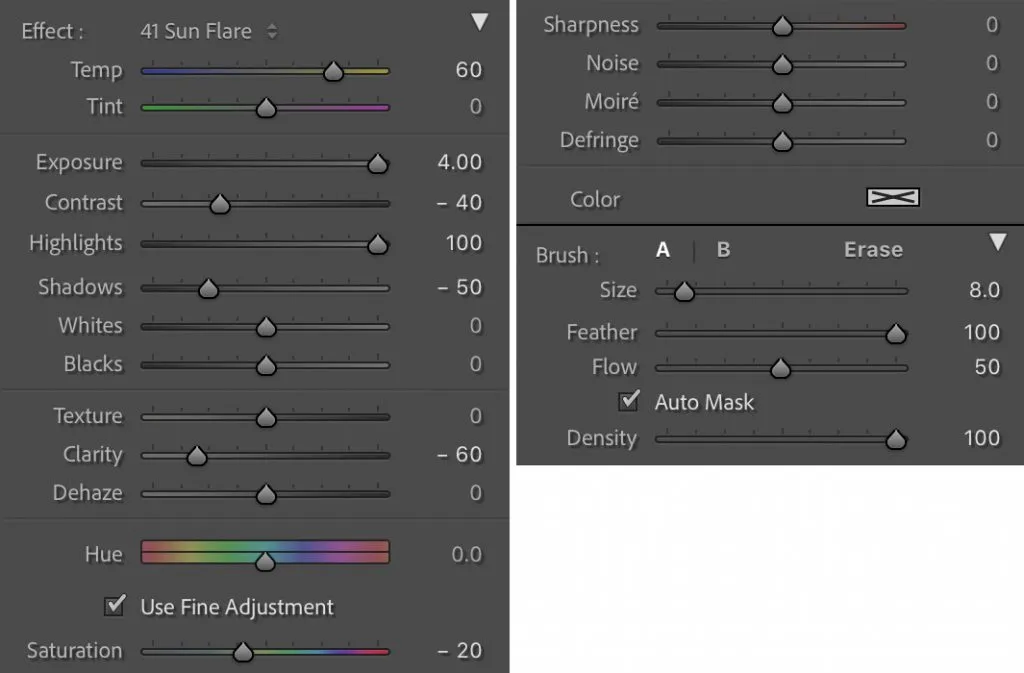
To create a believable effect, the brush is positioned strategically and aligned with the existing light direction in the scene. It is beneficial if the location is lit from behind to enhance the authenticity of the effect.
(Wrapping Up)
I shared seven lens flare tips to improve your photography skills and add a creative touch to your photos. While quality composition, posing, and lighting are crucial for incredible photography, intentionally using a lens flare can take your photos to the next level. It's important not to overdo it and use the effect deliberately for creative purposes.
Frequently Asked Questions (FAQs)
Users are searching for tips on lens flare to help them take more creative photos.
Q. Does Lens Flare Look Good?
Ans. Lens flare results from light reflecting off the smooth surfaces of camera lenses, making images appear less sharp or washed out. Many people consider it to be undesirable.
Q. Does The Human Eye See Lens Flare?
Ans. Camera lenses produce more lens flare than the human eye. When designing games, most developers aim to replicate the quality of human vision rather than a poor camera lens.
Q. Can Dirty Lens Cause Lens Flare?
Ans. If there is dust inside the lens or dirt and smudges on the front lens element or UV filter, it can cause more light reflection, leading to ghosting and flaring.
Q. What Is The Problem With Lens Flare?
Ans. Lens flare occurs when bright light enters your camera's lens, like the sun or any other source. Instead of reaching the sensor to create the image, it reflects within the lens.
Q. How Do You Position A Lens Flare?
Ans. To make the lens flare appear more natural, position it in the direction of the light source. Also, reducing the opacity can prevent it from being too overwhelming, as lens flares are easy to overdo. Remember, less is often more when it comes to adding lens flares.